September 30, 2020
Small Computer System Interface
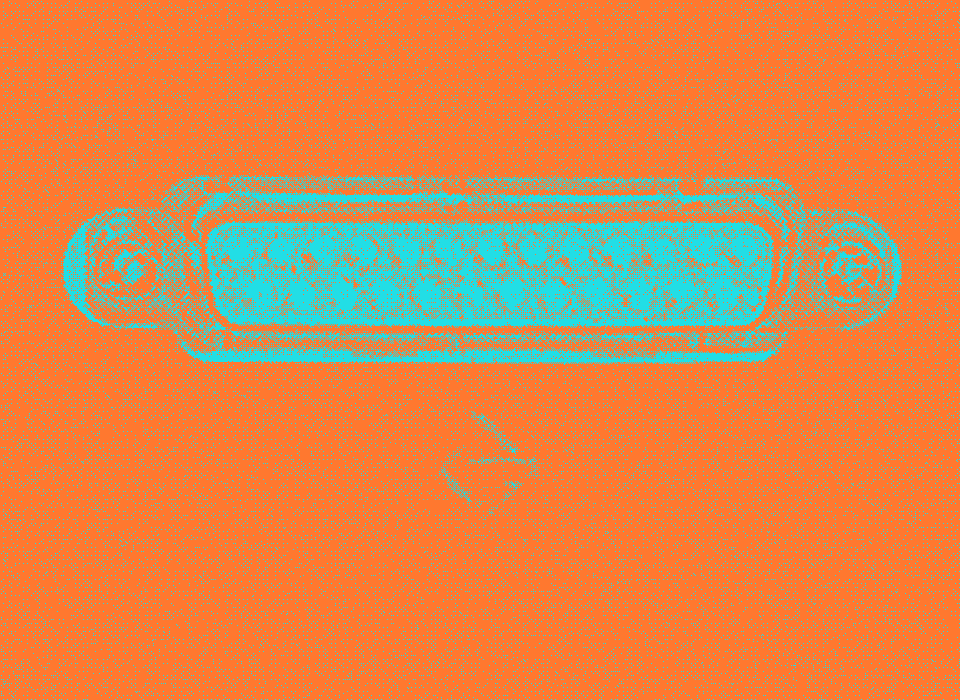
The SCSI hard disk drives utilize the Small Computer System Interface (or SCSI), which is a method of sending information back and forth between the CPU and a variety of peripherals.
SCSI was a standard developed by engineers from many companies working together through the American National Standards Institute. This parallel interface was designed to work with devices of many types from many different manufacturers, thus increasing the flexibility and sophistication of the user’s system.
SCSI Advantages
Speed: Information transfer between the computer and the peripheral was much faster because the SCSI device sent eight bits of data at the same time (parallel).
Flexibility: SCSI was a standard, so system software could be used to communicate with any of the many SCSI devices from different manufacturers.
Expandability: The Apple SCSI Cable System was used to connect as many as seven SCSI devices to a Macintosh system.
CARE AND HANDLING
Handling Precautions
SCSI hard disk drives are mechanical devices with moving parts. Rough handling such as jarring or bumping, especially during operation, can cause a mechanical failure or can damage information stored on the hard disk. Careless handling accounts for more hard disk drive failures than all other factors combined.
Place the SCSI hard disk drive on a soft, grounded surface before beginning any repairs.
Never move the drive during power-down. After power is turned off, the disks slow down, and (within 30 seconds) the heads will move to a safe position. Any jolts to the drive during the power-down period may cause the heads to crash.
Never drop a SCSI hard disk drive. Even a slight drop could cause drive failure.
ESD Prevention
Some of the components in the drive are sensitive to electrostatic discharge (ESD), which may be generated by your body, clothing, or articles in the environment. With this in mind, be sure to:
Keep the disk drive mechanism in its antistatic bag until you are ready to install it.
Work on a grounded mat and use a grounding wriststrap.
Keep common plastics, vinyl, polyester, and styrofoam away from the disk drive.
Do not touch the circuit board unless grounded.
For ESD prevention information, refer to You Oughta Know.
USING SCSI DRIVES WITH MACINTOSH SYSTEMS
Setting Priority Numbers
A priority number is what controls the accessing of all SCSI devices connected to a system. A separate priority number must be assigned to every SCSI device: one device, one number. This prevents two devices from sending data at the same time, which could damage files already saved.
The Macintosh SE or Macintosh II internal SCSI hard disk will have a priority number assigned automatically by the system. On the external hard disks, the priority number must be set by inserting an opened paper clip into the hole of the SCSI switch and clicking until the desired number is displayed. The SCSI select switch (Figure 1, #1) is located on the back of the hard disk case, below the SCSI ports (Figure 1, #2).
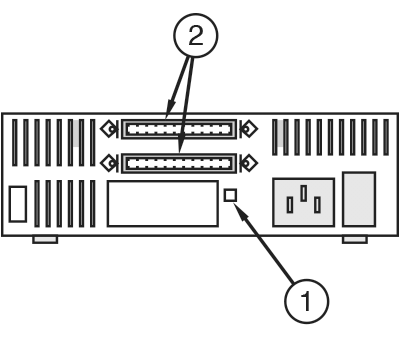 Figure 1
Switching On/Off
If you have connected an external SCSI hard disk to the external SCSI port of a Macintosh, turn on the hard disk before you turn on the computer. The hard disk will whir. Within 20 seconds the hard disk drive will be ready. Then power on the Macintosh.
In normal operation, the LED at the front of the SCSI hard disk indicates that the drive is in use. Never turn off the power if the LED is on or you may lose data on the hard disk. To power off, use the Macintosh shutdown procedure. The Macintosh will tell you when it can be switched off safely.
Reinitializing
Note: If you are trying to recover data from a customer’s Macintosh-formatted SCSI drive, first try running Disk First Aid to repair the hard disk (see instructions in this section).
When you reinitialize a hard disk, all data on the disk is erased. If you must reinitialize, find out if the customer’s files are backed up. Even if the hard disk is damaged, you may be able to back up files onto disks, tape, or another hard disk.
To reinitialize a SCSI hard disk with a Macintosh computer:
Set up the SCSI hard disk with a Macintosh computer.
Start up the most recent Macintosh System Tools disk.
Open the hard disk installer and follow the screen prompts to initialize the hard disk.
Note: You must use version 1.4 (or higher) of the installer. If the installer program on your diagnostic disk is an earlier version, discard the old installer and copy the Apple HD SC Setup program from the System Tools or Utilities disk (version 2.0.1 or higher) to your diagnostic disk.
Recopy backed-up files onto the reinitialized hard disk.
Disk First Aid
Disk First Aid is a utility program that Apple provides with the Macintosh operating system software. Use Disk First Aid to repair any hard disks or double-sided 800K floppy disks that use the Macintosh hierarchical file system (HFS). Disk First Aid runs only on Macintosh initialized hard disks or floppy disks.
Note: Be sure to use the latest version of the system software (currently version 6.0.7) and Disk First Aid program (version 1.4.3). To use Disk First Aid to repair a SCSI hard disk:
- If necessary, attach the external SCSI hard disk (to be repaired) to the Macintosh test station.
- Boot the Macintosh test station from a System Utilities disk.
- If necessary, turn on the SCSI hard disk and wait for the ready signal.
- Load the Disk First Aid program.
- The drive selection window, shown in Figure 2, lists an attached SCSI hard disk and gives its SCSI select number. If this is the drive you want to repair, click Open. If not, click Drive to change the selection.
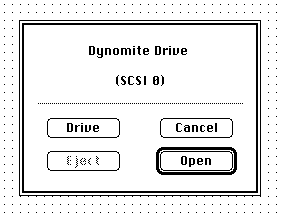 Figure 2, Disk First Aid circa 1991
- If the selected SCSI drive is also the system startup disk, you will see the window shown in Figure 3. Disk First Aid will not let you repair or erase the system disk, but it will allow you to verify it. If you want to verify the selected disk, click OK.
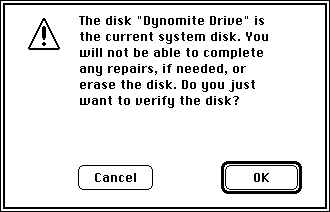 Figure 3, Disk First Aid circa 1991
The Ready to start window shown in Figure 4 will appear onscreen. From this window, if the drive being repaired is not the startup disk, then you have the following options:
Select Repair Automatically from the Options menu. This option enables you to verify and simultaneously repair the selected disk volume.
Select Erase Disk from the Options menu. Make sure all important data on the selected disk volume is backed up before using this option.
Click Start to begin the verification (only), verification and repair, or erase disk procedure. You may stop the test at any time by clicking Stop. You may also temporarily halt the test by clicking Pause, and then Resume.
The status (top) line will inform you when the test is finished and provides additional information about the status of the selected disk volume.
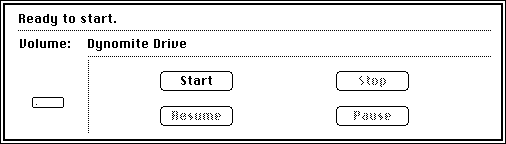 Figure 4, Disk First Aid circa 1991
If you want to repair another attached SCSI hard drive, pull down the File menu and select Close. Then pull down the File menu again and select Open Volume. This selection returns you to the drive selection window (see Figure 2).
When you are finished, select Quit from the File menu.
Video
James Wages demonstrates how to adapt the SCSI ID selector in the Apple Hard Disk 20SC to a newer SCSI hard disk. Benchmarks and noise levels for the stock Seagate ST-225N & Miniscribe 8425A hard disks are compared to the IBM DGHS hard disk. James Wages is meticulous with his show notes, which are rich with detail, and his videos deserve the highest accolades for their production value and an easy to follow instructional and educational format. If you like his work please consider leaving a thumbs-up on his you tube channel.