The Perfect Combination: Batocera Linux and a CRT Monitor for the Ultimate Retro Gaming Experience
April 26, 2023
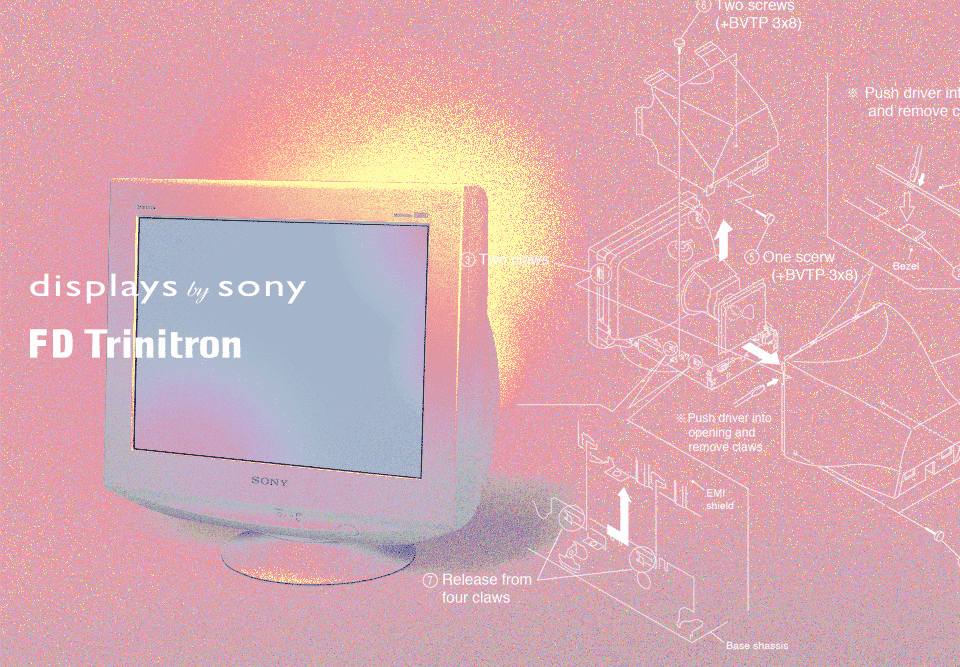 Sony Multiscan CPD E320
The Sony Multiscan CPD E320 is a high-quality CRT (Cathode Ray Tube) monitor that was designed and produced by Sony Corporation. This 21-inch monitor boasts impressive image clarity and color accuracy, making it an ideal choice for professionals in the fields of graphic design, video editing, and other visual-intensive applications. With a maximum resolution of 1600 horizontal dots x 1200 vertical lines, the Sony Multiscan CPD E320 provides users with a large viewing area and sharp, crisp images. Additionally, it features a range of advanced features such as horizontal and vertical moiré reduction, aperture grille technology, and a variety of video inputs. Despite its age, the Sony Multiscan CPD E320 remains a popular choice among those seeking a high-quality CRT monitor for Batocera Linux. Batocera is an operating system for retro gaming that includes pre-configured emulators and other software components, with EmulationStation as the primary graphical frontend for browsing and launching games.
TLDR
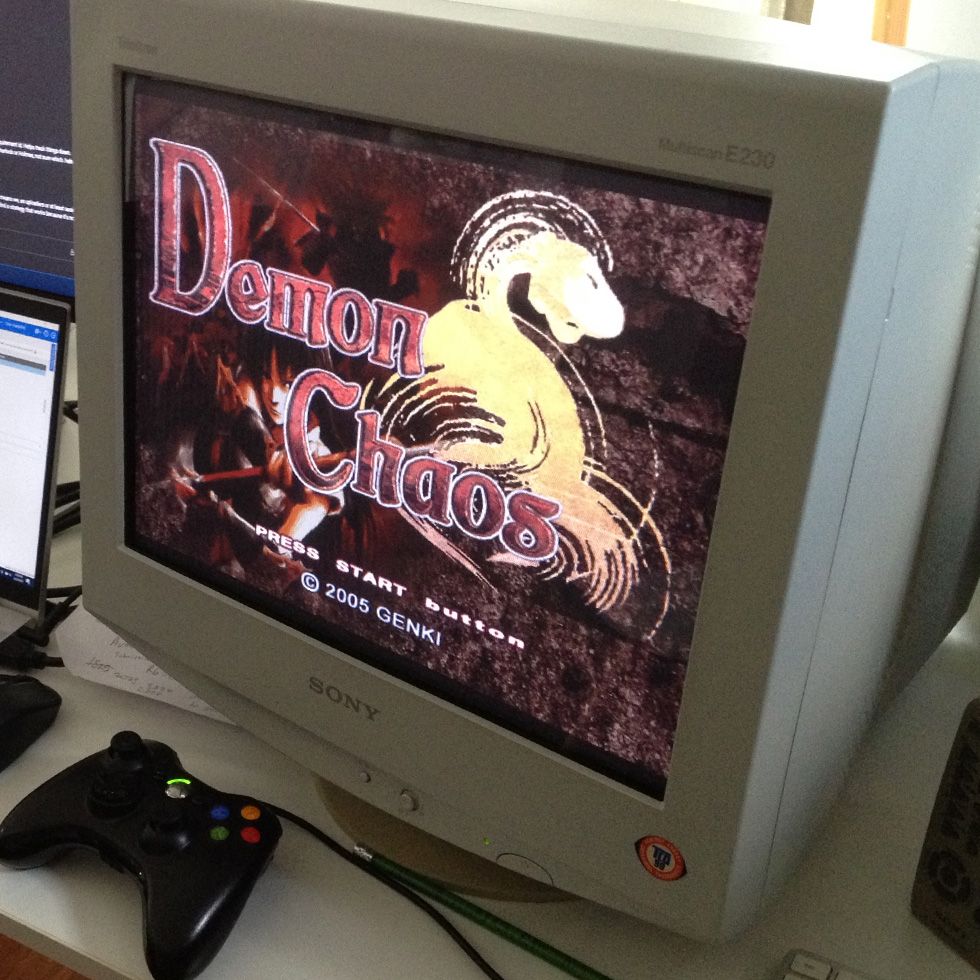
 As captured on an iPhone 4S, this photograph showcases the Atari 2600 Pac-Man game running on Batocera Linux, displayed on a Sony Multiscan E230 monitor via a native VGA output (no HDMI/DVI adapters). Despite some potential convergence issues, the overall quality of the image is excellent. I love Atari 2600 Pac-Man, it’s just so pokey!
The project “Build-CRT-15KHz-Batocera-V35” is intended for people who want to build a customized gaming system that can output video to a CRT monitor or TV with a 15-31 kHz horizontal refresh rate. This project is especially relevant for those who want to play classic arcade games that were designed to be played on CRT monitors, as these games often rely on the 15-31 kHz refresh rate. Furthermore, this project may appeal to individuals with an interest in constructing and modifying electronic devices, as it entails modifying the software configuration and potentially acquiring an older PC, such as the cost-effective and proficient Dell Optiplex 3020 (Series 4 Optiplex) minitower desktop. This PC model allows for flexibility in its hardware configuration, with the option to upgrade components such as the central processing unit (CPU), graphics card, memory (RAM), power supply unit (PSU), and install multiple hard drives.
The aforementioned github page, provides a bash script that automates the process of configuring Batocera Linux for CRT use. It will prompt the user with a series of questions to gather information about the user’s setup and preferences, and then use that information to modify the necessary configuration files.
The script is designed to be user-friendly and easy to follow, even for those who may not be familiar with Linux configuration. It includes comments and explanations for each step of the process, so users can understand what is happening and why.
Once the script is run, it will modify the necessary configuration files to enable CRT support and configure the display settings accordingly. The user will then be able to connect their CRT monitor and enjoy retro gaming on Batocera Linux with optimal display settings.
HORIZONTAL TIMING SPECIFICATIONS
| MODE AT PRODUCTION | MODE 1 | MODE 2 | MODE 3 | MODE 4 | MODE 5 (Primary Mode) | MODE 6 | MODE 7 | MODE 8 |
|---|---|---|---|---|---|---|---|---|
| RESOLUTION | 640 X 480 | 800 X 600 | 832 X 624 | 1024 X 768 | 1024X 768 | 720 X 400 | 640 X 480 | 1280 X 1024 |
| RESOLUTION CLOCK | 25.175MHZ | 56.250 MHz | 57.283 MHz | 78.750 MHz | 94.500 MHz | 28.322 MHz | 36.000 MHz | 135.000 MHz |
| H.FREQ (kHz) | 31.469 kHz | 53.674 kHz | 49.725 kHz | 60.023 kHz | 68.677 kHz | 31.469 kHz | 43.269 kHz | 79.976 kHz |
| H.TOTAL (in μsec) | 31.778 | 18.631 | 20.111 | 16.660 | 14.561 | 31.777 | 23.111 | 12.504 |
| H.BLK (in μsec) | 6.356 | 4.409 | 5.586 | 3.657 | 3.725 | 6.355 | 5.333 | 3.022 |
| H.FP (in μsec) | 0.636 | 0.569 | 0.559 | 0.203 | 0.508 | 0.636 | 1.556 | 0.119 |
| H.SYNC (in μsec) | 3.813 | 1.138 | 1.117 | 1.219 | 1.016 | 3.813 | 1.556 | 1.067 |
| H.BP (in μsec) | 1.907 | 2.702 | 3.910 | 2.235 | 2.201 | 1.907 | 2.222 | 1.837 |
| H.ACTIV (in μsec) | 25.422 | 14.222 | 14.524 | 13.003 | 10.836 | 25.422 | 17.778 | 9.481 |
Horizontal Timing Specifications, explained
The table shows the horizontal timing specifications for eight different display modes. These modes vary in their resolution and refresh rates. The table provides information on various parameters such as resolution, resolution clock, horizontal frequency, total horizontal time, blanking time, front porch time, sync time, back porch time, and active time. These parameters are measured in units of pixels or microseconds. The information provided in the table can be useful in designing and optimizing displays and graphics applications.
MODE AT PRODUCTION
This refers to the particular display mode that was used during the manufacturing of the Sony Multiscan CPD E230 monitor.
RESOLUTION
This indicates the display resolution for each of the listed modes, given in pixels (width X height).
RESOLUTION CLOCK
This is the frequency of the pixel clock signal used to synchronize the display of each pixel in the given resolution.
H.FREQ
Horizontal Frequency, measured in kilohertz (kHz). It is the number of times per second that a complete horizontal scan is displayed on the screen.
H.TOTAL
Total Time for one horizontal line, measured in μsec. It is the time it takes to display one line of pixels from left to right, including blanking time.
H.BLK
Horizontal Blanking Time, measured in μsec. It is the time when the electron beam is turned off at the end of each scan line, allowing the electron gun to move back to the beginning of the next scan line.
H.FP
Horizontal Front Porch, measured in μsec. It is the time between the end of the horizontal sync pulse and the start of the active video signal. This is when the monitor prepares to display the image.
H.SYNC
Horizontal Sync Pulse Width, measured in μsec. It is the duration of the signal that tells the monitor when to start a new line.
H.BP
Horizontal Back Porch, measured in μsec. It is the time between the end of the active video signal and the start of the horizontal sync pulse. This is when the monitor stops displaying the image.
Horizontal Active Video Time, measured in μsec. It is the time during which the monitor displays the active video signal (the actual image), excluding the front and back porch.
VERTICAL TIMING SPECIFICATIONS
| MODE AT PRODUCTION | MODE 1 | MODE 2 | MODE 3 | MODE 4 | MODE 5 (Primary Mode) | MODE 6 | MODE 7 | MODE 8 |
|---|---|---|---|---|---|---|---|---|
| RESOLUTION | 640 X 480 | 800 X 600 | 832 X 624 | 1024 X 768 | 1024X 768 | 720 X 400 | 640 X 480 | 1280 X 1024 |
| RESOLUTION CLOCK | 25.175 MHz | 56.250 MHz | 57.283 MHz | 78.750 MHz | 94.500 MHz | 28.322 MHz | 36.000 MHz | 135.000 MHz |
| V.FREQ (Hz) | 59.940 Hz | 95.061 Hz | 74.550 Hz | 75.029 Hz | 84.997 Hz | 70.087 Hz | 85.008 Hz | 75.025 Hz |
| V.TOTAL (lines) | 525 | 631 | 667 | 800 | 808 | 449 | 509 | 1066 |
| V.BLK (lines) | 45 | 31 | 43 | 32 | 40 | 49 | 29 | 42 |
| V.FP (lines) | 10 | 1 | 1 | 1 | 1 | 12 | 1 | 1 |
| V.SYNC (lines) | 2 | 3 | 3 | 3 | 3 | 2 | 3 | 3 |
| V.BP (lines) | 33 | 27 | 39 | 28 | 36 | 35 | 25 | 38 |
| V.ACTIV (lines) | 480 | 600 | 624 | 768 | 768 | 400 | 480 | 1024 |
Vertical Timing Specifications, explained
This is a table detailing the Vertical Timing Specifications for eight different modes in a production setup. The table contains information on the resolution, resolution clock, vertical frequency (in Hz), total number of lines, number of blank lines, number of front porch lines, number of sync lines, number of back porch lines, and the number of active lines for each mode. This information is essential for ensuring the proper functioning and synchronization of display devices.
V.FREQ (Hz)
This is the vertical refresh rate, measured in hertz (Hz), which indicates how many times per second the entire screen is redrawn.
V.TOTAL (lines)
This is the total number of lines in the vertical video signal, including blanking intervals and non-displayed lines.
V.BLK (lines)
This is the number of blanking lines in the vertical video signal.
V.FP (lines)
This is the number of front porch lines in the vertical video signal, which is a blank area at the beginning of each video line that allows the electron beam to settle before drawing the image.
V.SYNC (lines)
This is the number of lines in the vertical video signal that are dedicated to the vertical sync pulse, which synchronizes the CRT’s electron beam with the video signal.
V.BP (lines)
This is the number of back porch lines in the vertical video signal, which is a blank area at the end of each video line that allows the electron beam to reset before starting the next line.
This is the number of active lines in the vertical video signal that are used to display the image, excluding any blanking intervals or porch lines.
SYNC TIMING SPECIFICATIONS
| MODE AT PRODUCTION | MODE 1 | MODE 2 | MODE 3 | MODE 4 | MODE 5 (Primary Mode) | MODE 6 | MODE 7 | MODE 8 |
|---|---|---|---|---|---|---|---|---|
| RESOLUTION | 640 X 480 | 800 X 600 | 832 X 624 | 1024 X 768 | 1024X 768 | 720 X 400 | 640 X 480 | 1280 X 1024 |
| INT (G) | NO | NO | NO | NO | NO | NO | NO | NO |
| EXT (H/V) /POLARITY | YES N/N | NO P/P | YES N/N | YES P/P | YES P/P | YES N/P | YES N/N | YES P/P |
| EXT (CS) /POLARITY | NO | NO | NO | NO | NO | NO | NO | NO |
| INT/NON INT | NON INT | NON INT | NON INT | NON INT | NON INT | NON INT | NON INT | NON INT |
Sync Timing Specifications, explained
This table provides the sync timing specifications for different modes of production. It includes information on the resolution and synchronization type, including whether internal or external sync is required, as well as the polarity of horizontal and vertical sync and color sync. The table covers eight modes of production, each with its own set of specifications. The first column in the table refers to various synchronization specifications for each mode of production. Here is what each value means in the table:
INT (G)
This refers to the presence or absence of an internal sync generator. “NO” means there is no internal sync generator and “YES” means there is an internal sync generator.
EXT (H/V) /POLARITY
This refers to the type of external sync input and polarity. “YES N/N” means the external sync input is negative/negative and “YES N/P” means the external sync input is negative/positive. “NO P/P” means there is no external sync input with positive polarity and “YES P/P” means the external sync input is positive/positive.
EXT (CS) /POLARITY
This refers to the type of external composite sync input and polarity. “NO” means there is no external composite sync input and “YES” means there is an external composite sync input.
This refers to the type of sync output. “NON INT” means the sync output is non-interlaced and “INT” means the sync output is interlaced.
Configuring Horizontal and Vertical Sync Timing Specifications for Batocera Linux Video Output
A monitor’s horizontal and vertical sync timing specifications are relevant to Batocera Linux (as well as any other operating system or software that outputs video to a display) because they determine the timing of the video signal that is sent from the graphics hardware to the monitor.
When the graphics hardware generates a video signal, it needs to synchronize the timing of the horizontal and vertical sync signals with the timing of the pixels that make up the video image. If the timing is off, the image may appear distorted, flicker, or not display at all. The monitor’s horizontal and vertical sync timing specifications determine the timing requirements for the sync signals that are needed to properly display the image on the monitor. Batocera Linux (and other operating systems or software that output video) needs to be configured to output video signals that match the timing requirements of the monitor in order to properly display the image. If the video signal output by the operating system or software does not match the timing requirements of the monitor, the image may not display correctly.
Therefore, it is important to ensure that the monitor’s horizontal and vertical sync timing specifications are properly configured in Batocera Linux (or any other operating system or software that outputs video) in order to ensure that the image is displayed correctly on the monitor.
The file that manages the horizontal and vertical sync timing specifications in Batocera Linux is the config.txt file located in the /boot partition of the SD card or USB drive used to boot the system. This file contains various configuration options for the Raspberry Pi hardware, including settings related to the video output.
To configure the horizontal and vertical sync timing specifications in Batocera Linux, you can add or modify the appropriate settings in the config.txt file. Specifically, the hdmi_timings option can be used to set custom horizontal and vertical sync timings for the video output.
However, please note that modifying the config.txt file can be a complex process and may require some technical knowledge. It is important to carefully read the documentation and follow the instructions provided to avoid causing damage to the hardware or rendering the system unusable.
The file that manages the horizontal and vertical sync timing specifications in Batocera Linux on a PC with VGA output is typically the xorg.conf file. This file contains various configuration options for the X Window System, including settings related to the video output.
To configure the horizontal and vertical sync timing specifications in Batocera Linux on a PC with VGA output, you can add or modify the appropriate settings in the xorg.conf file. Specifically, you would need to define a ModeLine with the appropriate timing parameters, such as the sync polarity, horizontal and vertical resolution, and timing parameters.
However, please note that modifying the xorg.conf file can be a complex process and may require some technical knowledge. It is important to carefully read the documentation and follow the instructions provided to avoid causing damage to the hardware or rendering the system unusable.
The xorg.conf file. How to Configure Sony Multiscan CPD E230 Monitor (or equivalent) with VGA Output on Batocera Linux
Here is a sample xorg.conf file for the Sony Multiscan CPD E230 monitor with VGA output on Batocera Linux. Let’s take a look at what it does (aka best attempt).
Section "Monitor"
    Identifier  "Sony Multiscan CPD E230"
    HorizSync   30-96
    VertRefresh 48-160
    ModeLine    "640x480@60" 25.175 640 656 752 800 480 490 492 525
    ModeLine    "800x600@60" 40.000 800 840 968 1056 600 601 605 628
    ModeLine    "1024x768@60" 65.000 1024 1048 1184 1344 768 771 777 806
EndSection

Section "Device"
    Identifier  "Standard VGA"
    Driver      "vga"
EndSection

Section "Screen"
    Identifier  "Default Screen"
    Device      "Standard VGA"
    Monitor     "Sony Multiscan CPD E230"
    DefaultDepth    24
    SubSection "Display"
        Depth       24
        Modes       "640x480@60" "800x600@60" "1024x768@60"
    EndSubSection
EndSection
In this sample configuration file, we have defined the Sony Multiscan CPD E230 monitor with a horizontal sync range of 30-96 kHz and a vertical refresh rate range of 48-160 Hz. We have also defined three ModeLine configurations for resolutions of 640x480, 800x600, and 1024x768, each with their respective timing parameters. The timing parameters in the ModeLine configurations are in MHz (megahertz) and pixels. The first value after the resolution specifies the pixel clock, which is the rate at which pixels are transmitted by the video card to the monitor. The next eight values are the horizontal timing parameters, which specify the start and end positions of the horizontal blanking interval, the horizontal sync pulse, and the active video area. The last four values are the vertical timing parameters, which specify the start and end positions of the vertical blanking interval, the vertical sync pulse, and the active video area. Finally, we have defined the device and screen sections, with the default screen set to use the Sony Multiscan CPD E230 monitor and the three defined resolutions.
The sample configuration file can be added in Batocera Linux by following these steps:
- Boot up your Batocera Linux PC and connect it to the monitor.
- Navigate to the main menu and select “Configuration.”
- From the Configuration menu, select “Advanced settings.”
- Scroll down to the “Video output configuration” section and select “Custom mode.”
- Enter the information from the sample configuration file into the appropriate fields.
- Save the changes and reboot your system.
Alternatively, you can also add the configuration file by accessing the Batocera Linux system files via SSH or a terminal and manually editing the configuration file located at /userdata/system/batocera.conf. Any changes made to this file will only affect the user’s specific configuration and will not be system-wide. However, it is also possible to modify the global configuration file located at /boot/batocera/batocera.conf, which will affect the system-wide configuration for all users. However, it is generally recommended to make configuration changes in the /userdata/system/batocera.conf file to avoid affecting other users on the system.
After executing the script provided by the GitHub link at the beginning of the article, the /etc/X11/xinit configuration on my system has been updated as follows; We will breakdown what all of it means after this segment of code.
#!/bin/sh

# hide mouse cursor
unclutter --noevents -b

# disable dpms to prevent screen from blanking
xset -dpms
xset s off

# allow coredumps for ES
ulimit -H -c unlimited
ulimit -S -c unlimited emulationstation

# dbus launch is required for the gio/gvfs/trash:///...
eval `dbus-launch --sh-syntax --exit-with-session`

### nvidia ###
nvidia_prime="$(/usr/bin/batocera-settings-get -f /boot/batocera-boot.conf nvidia-prime)"
if test "${nvidia_prime}" = "true"
then
  export __NV_PRIME_RENDER_OFFLOAD=1
  export __VK_LAYER_NV_optimus=NVIDIA_only
  export __GLX_VENDOR_LIBRARY_NAME=nvidia
fi

### radeon ###
# variable for AMD Dynamic Switchable Graphics to take amd-radeon gpu over intel cards when such hybrid cards are available
radeon_prime="$(/usr/bin/batocera-settings-get -f /boot/batocera-boot.conf radeon-prime)"
if test "${radeon_prime}" = "true"
then
    export DRI_PRIME=1
fi

########################
#####-CRT CONFIG-#######
########################
##-Default Resolution-##
########################
xrandr -display :0.0 --newmode "640x480i" 13.10 640 664 728 832 480 484 490 525 interlace -hsync -vsync
xrandr -display :0.0 --addmode VGA-1 "640x480i"
xrandr -display :0.0 --output VGA-1 --mode "640x480i"
########################
########################

openbox --config-file /etc/openbox/rc.xml --startup "emulationstation-standalone"
It looks like the existing configuration is similar to the xorg.conf suggested earlier, which is to use xrandr to add a new mode for the desired resolution and refresh rate, and then set that mode as the output for the display. The only difference is that the existing configuration above is using “640x480i” as the new mode name, whereas the xorg.conf at the top suggests using “320x240_60.00” for a 320x240 resolution with a 60Hz refresh rate.
Interlaced video modes like “640x480i” split the image into two fields, with one field containing even-numbered lines and the other field containing odd-numbered lines. Each field is displayed one after the other, with the result that the displayed image consists of alternating lines from each field. This can create a flicker effect, which some people find distracting. In my case, the said /etc/X11/xinit file doesn’t seem to add any flicker.
Let’s break down the contents of /etc/X11/xinit.
# hide mouse cursor
unclutter --noevents -b
This line runs the unclutter command with the options --noevents and -b.
unclutter is a command-line utility that hides the mouse cursor when it is not being used. The --noevents option tells unclutter not to generate mouse events, which can be useful for applications that rely on precise mouse coordinates.
The -b option tells unclutter to run in the background, allowing other commands to run concurrently.
# disable dpms to prevent screen from blanking
xset -dpms
xset s off
These two lines are related to power management of the display.
The xset command is a utility for setting various X server preferences, and the -dpms option disables DPMS (Display Power Management Signaling) which is a feature of the X server that allows the monitor to enter into power-saving mode after a period of inactivity.
The xset s off command disables the screen saver, which can also cause the display to turn off after a certain amount of time.
# allow coredumps for ES
ulimit -H -c unlimited
ulimit -S -c unlimited emulationstation
These lines are used to allow coredumps for the EmulationStation (ES) process.
A coredump is a file that contains a snapshot of an executing program’s memory at a specific time, which can be used for debugging purposes. By setting the coredump size to unlimited, any issues or crashes that occur during the execution of EmulationStation will generate a coredump file that can be used to diagnose the issue.
Theulimit command is used to set limits on various system resources, including the size of coredump files. The `-H option sets the hard limit, which is the maximum value that a soft limit can be increased to, and the -S option sets the soft limit, which is the value that can be changed by the process itself. In this case, the -c option is used to set the maximum size of a coredump file, and the unlimited value indicates that there is no maximum size limit. The emulationstation argument specifies that the limit should only apply to the EmulationStation process.
# dbus launch is required for the gio/gvfs/trash:///...
eval `dbus-launch --sh-syntax --exit-with-session`
The dbus-launch command is used to launch a D-Bus session bus instance and set up the environment variables for it. D-Bus is a message bus system that allows different programs to communicate with each other.
In this case, dbus-launch is being used to set up the environment variables required for the GIO (Gnome Input/Output) library to work properly. GIO is a library that provides a file and data storage API, as well as network transparency and other features.
The --sh-syntax option makes dbus-launch output shell commands that set the environment variables, rather than setting them directly in the shell. The --exit-with-session option causes the D-Bus session bus to terminate when the session ends.
The eval command is used to evaluate the output of dbus-launch, effectively setting up the environment variables for the current shell session, such as Gio/GVFS, which handles the “trash://” protocol for moving files to the trash.
What is Gio/GVFS?
Gio (short for Gnome Input/Output) is a library in the GNOME desktop environment that provides a platform-independent way to access and manipulate files and network resources. It provides an abstraction layer over various protocols, such as HTTP, FTP, SFTP, SMB, and others. GVFS (short for GNOME Virtual File System) is a system built on top of Gio that provides a uniform way to access files and folders across multiple protocols and network shares, as if they were all part of the same local file system. GVFS also provides features like mounting remote file systems, performing file operations, and accessing metadata like file permissions and MIME types.### nvidia ###
nvidia_prime="$(/usr/bin/batocera-settings-get -f /boot/batocera-boot.conf nvidia-prime)"
if test "${nvidia_prime}" = "true"
then
export __NV_PRIME_RENDER_OFFLOAD=1
export __VK_LAYER_NV_optimus=NVIDIA_only
export __GLX_VENDOR_LIBRARY_NAME=nvidia
fiThis script segment checks if the nvidia-prime option is enabled in the /boot/batocera-boot.conf file.
If nvidia-prime is set to true, then it sets the following environment variables to enable the offloading of rendering to the NVIDIA graphics card:
__NV_PRIME_RENDER_OFFLOAD=1: This enables the NVIDIA GPU to be used for rendering.
__VK_LAYER_NV_optimus=NVIDIA_only: This specifies that only the NVIDIA GPU should be used for Vulkan rendering.
__GLX_VENDOR_LIBRARY_NAME=nvidia: This specifies that the NVIDIA GLX library should be used instead of the default one.
This segment of code is relevant for systems with hybrid graphics setups, where there is both an integrated GPU (usually an Intel one) and a discrete GPU (usually an NVIDIA one) in the system. The nvidia-prime option allows for the NVIDIA GPU to be used for rendering while still using the integrated GPU for normal display output.
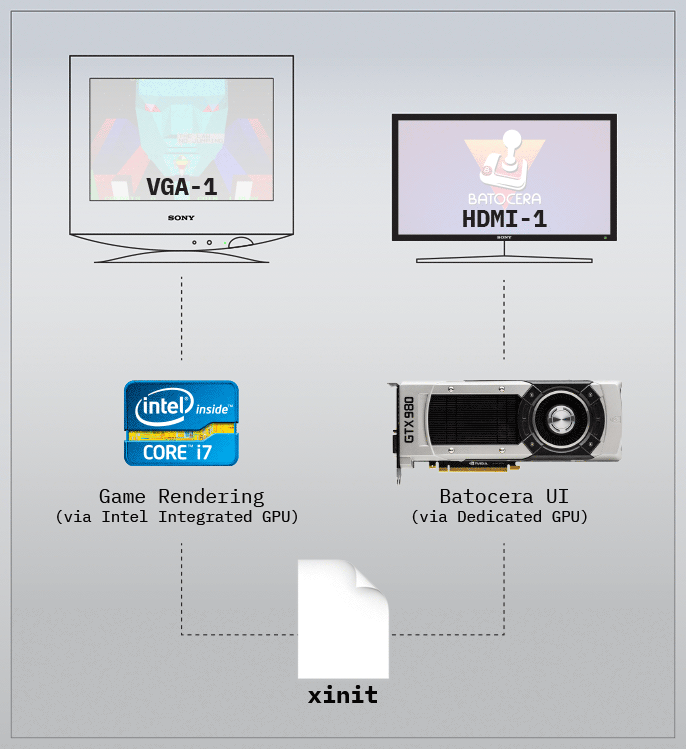
NOTE: If you want to render games on the Sony Multiscan via Intel’s integrated GPU while using a separate flat screen to display the Batocera UI via a dedicated GPU, you can use the following code segment in the xinit file as illustrated below.
### NVIDIA ###
nvidia_prime="$(/usr/bin/batocera-settings-get -f /boot/batocera-boot.conf nvidia-prime)"
if test "${nvidia_prime}" = "true"
then
  # Set VGA-1 output to 640x480 resolution
  # and position it at the top-left corner of the screen
  xrandr --output VGA-1 --mode 640x480 --pos 0x0 --rotate normal

  # Set HDMI-1 output to auto mode, position it at the top-right corner of the screen
  # and rotate it normally
  xrandr --output HDMI-1 --auto --pos 640x0 --rotate normal

  # Set environment variables to enable NVIDIA GPU offloading
  export __NV_PRIME_RENDER_OFFLOAD=1
  export __VK_LAYER_NV_optimus=NVIDIA_only
  export __GLX_VENDOR_LIBRARY_NAME=nvidia

  # Use optirun to start EmulationStation in a 640x480 window on the VGA-1 output
  optirun /usr/bin/emulationstation --screensize 640 480 --screenoffset 0 0 --gamelist-view detailed --windowed 1
else
  # Start EmulationStation in full-screen mode with a 1920x1080 resolution on the primary display
  emulationstation --screensize 1920 1080 --screenoffset 0 0 --gamelist-view detailed
fi
First, the GPU for rendering would need to be specified. This can be done by setting the __NV_PRIME_RENDER_OFFLOAD variable to 0 (meaning use the integrated GPU) or 1 (meaning use the discrete GPU).
Then, Xorg would need to be configured to use the integrated GPU for display and the discrete GPU for rendering. This can be done by modifying the xinit script to use the xrandr command to set up two separate X screens, with each screen using a different GPU.
Finally, the application would need to be configured to use the correct GPU for rendering. This can be done by setting the __NV_PRIME_RENDER_OFFLOAD environment variable to the appropriate value before launching the application.
########################
#####-CRT CONFIG-#######
########################
##-Default Resolution-##
########################
xrandr -display :0.0 --newmode "640x480i" 13.10 640 664 728 832 480 484 490 525 interlace -hsync -vsync
xrandr -display :0.0 --addmode VGA-1 "640x480i"
xrandr -display :0.0 --output VGA-1 --mode "640x480i"
########################
########################
This segment of code sets the default resolution for a CRT monitor to 640x480i (interlaced). It achieves this by creating a new mode with the xrandr command that specifies the necessary timings and other parameters to achieve this resolution on the display. The new mode is then added to the VGA-1 output using the --addmode option, and the output is set to use the new mode using the --output and --mode options.
openbox --config-file /etc/openbox/rc.xml --startup "emulationstation-standalone"This line launches the Openbox window manager with the configuration file at /etc/openbox/rc.xml. Additionally, it starts the emulationstation-standalone program as soon as Openbox has started.
Classic Games with an Authentic Gaming Experience on Batocera Linux
Using Batocera Linux with VGA output to a CRT monitor, gamers can experience classic arcade and console games as they were meant to be played, with an authentic look and feel that cannot be replicated on modern LCD screens. The use of a CRT monitor adds a sense of nostalgia to the gaming experience and rivals the typical TV sets of the day in terms of console gaming. Furthermore, the hardware modifications required to set up the system, which include CPU upgrades, hard drive installation, and adjustments, can provide a rewarding tinkering experience for those interested in electronics and software. Overall, running Batocera Linux with VGA out to a CRT monitor using the Build-CRT-15KHz-Batocera-V35 script offers a unique and enjoyable gaming experience for classic arcade game enthusiasts and a great opportunity for tinkering with hardware and software. ■